Guide:Mechdusa strategies
Mechdusa is an early Hardmode boss exclusive to Get fixed boi worlds which is composed of all three mechanical bosses. It is essentially a forced triple boss fight.
| Type | |
|---|---|
| Environment | |
| Max Life | 256,800327,420436,560 (total) |
- Item (Quantity)Rate
 Waffle's Iron(Desktop, Console and Mobile versions)100%
Spawn Conditions
Mechdusa can only be spawned in a world with the secret seed Getfixedboi, through one of two methods:
- If at least 1
 Demon/
 Crimson Altar has been smashed, and any mechanical boss has not been defeated yet, it has a 1/20 chance of spawning each night
 - Using an
 Ocram's Razor
The Fight
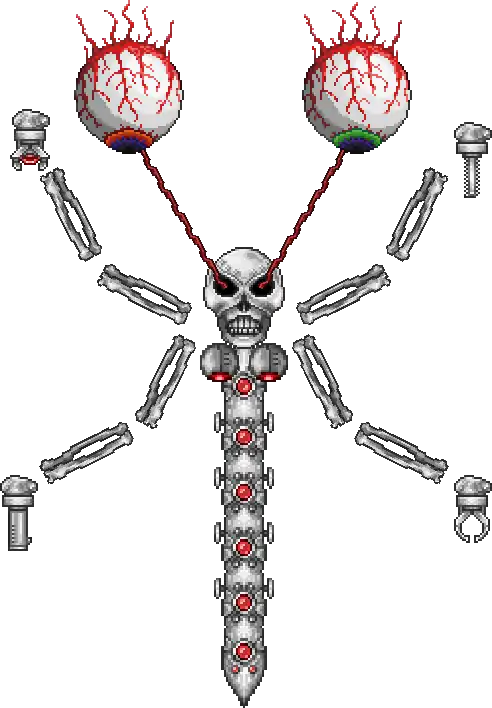
The Mechdusa is three separate bosses merged into one, all of which must be defeated. They have a combined health of 256,800 / 327,420 / 436,560, shared between them. Those bosses are Skeletron Prime, The Destroyer, and The Twins.
When the Mechdusa spawns, the bosses are all connected together. Skeletron Prime is at the center, restricting the movement of the others from their normal behavior for as long as it is alive.
While the Twins are attached to Skeletron Prime, Retinazer will generally stay to the left while Spazmatism will generally stay to the right. This can be useful when trying to avoid their attacks; for instance, phase two Spazmatism is less likely to hit players who stay on the left.
Skeletron Prime will try to position itself 28.125 blocks to the side of and between 17.75 and 21.875 blocks above the player when not "spinning". Its spin attack no longer actually spins, but Prime's head will still move towards the player at 0.6x the normal speed, or 0.75x after the Destroyer's death. Skeletron Prime's arms are unaffected by being a part of Mechdusa, other than them hovering near the head which is in a different spot than normal.
The Destroyer's head will follow Skeletron Prime's position, while its body will follow each previous segment as normal. While Skeletron Prime is alive, Probes will fire lasers every 6 seconds, as opposed to the normal 2, and are completely unable to directly ram the player, instantly adjusting their position to avoid contact.
When not dashing, the Twins move to be 11.71875 blocks above and 7.03125 blocks to the side of Skeletron Prime's head, as opposed to positions relative to the player. They will wait twice as long between dashes in phase 1 and four times as long during phase 2, as well as twice the time gap between shooting projectiles (1.5x as long after the Destroyer dies).
Given that every mechanical boss receives many nerfs, both large and small, while Skeletron Prime is alive, Skeletron Prime should ideally be the last boss of the three you kill. The Destroyer is easiest to kill first, but killing the Twins first can work if most of the Destroyer remains underground, unable to shoot lasers.
General Strategies
This content is transcluded from Guide:Practical tips § Combat.
- For nocturnal bosses, starting the battle just after the sun sets (7:30 PM) will provide the maximum amount of time to defeat the boss. In Hardmode, the
 Moon Charm and/or
  Moon Stone and their upgrades are also useful at night.
 - Boss battles can be won or lost before the battle ever starts. Choose your equipment and have it ready; find and/or make potions and placed buffs; use the highest-tier food you have available; set up an arena appropriate to the boss; learn the strategies for the boss you're facing.
- Prepare your Boss-fighting arena with adequate lighting,
 Campfires and
  Heart Lanterns for health regeneration, and
  Stars in Bottles for mana regeneration if you use magic.
  Bast Statues(Desktop, Console and Mobile versions) will provide a significant defensive boost.
  Garden Gnomes(Desktop, Console and Mobile versions) and (Desktop, Console and Mobile versions) (if underground) proper torch placement will reduce damage taken and increase damage dealt due to the luck. The Torch God's Favor(Desktop, Console and Mobile versions) helps with this.
  Honey pools can also be used for extra health regeneration.
 - (Desktop, Console and Mobile versions)
 Sunflowers provide the
  Happy!(Desktop, Console and Mobile versions) buff to nearby players, which grants a +10% movement speed bonus and 17% reduction in enemy spawn rate.
 - Always carry around a stack of the highest-tier healing potion available, as relying only on natural health regeneration is not a good idea. Depending on the game stage, this can include items such as
 Lesser Healing Potions or
  Honeyfins. On the
  Desktop,
  Console, and
  Mobile versions,
  Restoration Potions are healing potions with a shorter cooldown.
- Likewise, carry mana potions if you use Magic.
- The
 Strange Brew(Desktop, Console and Mobile versions) is also an option, which yields very similar healing abilities to Healing Potion with added chances to trigger periods of invulnerability upon consumption.
 - On the
 Old-gen console version and Nintendo
  version, Restoration Potions can save a slot, but will likewise trigger both cooldowns.
- It is suggested to build houses for the
 Dryad and the
  Nurse NPCs in your arena. The former casts the
  Dryad's Blessing(Desktop, Console and Mobile versions) buff, which increases your defense and provides you with a thorns-like effect, while the latter can heal and remove debuffs instantly, at the cost of some
  coins.
 - Bosses are displayed on the Minimap: Follow the boss's icon to track it when you're struggling to find it. You can identify the boss icons by checking their respective wiki pages.
- Once you have freed the
 Mechanic in the Dungeon, you can use
  Wire to enhance your arena with
  Traps and helpful
  Heart and
  Star Statues. The former helps to damage the enemies, though be careful to set them up correctly in order not to hurt yourself during the battle. The latter will spawn heart and star pickups, respectively. Connect these devices to
  timers to activate them infinitely.
 - It may be useful to summon and kill the Eye of Cthulhu or King Slime before summoning any harder boss in order to spawn an extra one-use pool of Hearts. Note that this will take up a big chunk of the spawnable healing Hearts, which will cause Heart Statues to not spawn as many/any Hearts.
- Remember to use the
 Sharpening Station(Desktop, Console and Mobile versions),
  Ammo Box(Desktop, Console, Old-gen console and Mobile versions),
  Crystal Ball,
  Bewitching Table(Desktop, Console and Mobile versions),
  War Table(Desktop, Console and Mobile versions), and
  Slice of Cake(Desktop, Console and Mobile versions) before you go to explore or battle bosses/invasions. These will give boosts that are useful to have, with the first five being class-specific. They give
  Sharpened(Desktop, Console and Mobile versions),
 .png) Ammo Box(Desktop, Console, Old-gen console and Mobile versions),
Ammo Box(Desktop, Console, Old-gen console and Mobile versions),  Clairvoyance,
  Bewitched(Desktop, Console and Mobile versions),
  Strategist(Desktop, Console and Mobile versions), and
  Sugar Rush(Desktop, Console and Mobile versions), respectively.
Terrain Preparation
Due to Mechdusa's large size and the ease of running away from it, a large arena makes the fight much easier. A surface arena provides the most space, but requires using lava to block enemy spawns and has low gravity. The spawning island also makes a good arena with very little threat from enemy spawns, but can be lacking in vertical leeway if you do not clear out space using Dynamite or a Gravedigger's Shovel.
A surface arena is faster to make, while an underworld arena is easier to build and use for the fight.
One option for staying away from Mechdusa is to outrun her using Dunerider Boots. Hardened Sand Blocks can be crafted at a Solidifier, and particularly on the surface, a Gravitation Potion can allow the player to run at high speeds on both the ground and the ceiling to pass behind Mechdusa.
Another option is to use a Featherfall Potion to dodge attacks by jumping. In this case, you can include a layer of platforms as well; if Mechdusa spawns on a platform, the Destroyer component will be exposed for huge amounts of damage upon spawning, letting you easily kill it before it can threaten you.
Teleporters are another option for passing by Mechdusa. Teleporting up or down at the edges of a runway can automate the process of going over or under Mechdusa to continue running the other way.
Gearing Up
Mounts
Early Hardmode has many strong mounts that can greatly help in this fight, either as an aid to mobility or to replace it entirely.
 Golf Cart Keys has solid all-around stats and good acceleration coupled with the ability to ram enemies horizontally for iframes.
 Lilith's Necklace is the easiest to obtain of these mounts due to the permanent surface nighttime, and has better speed and jumps than the golf cart, in return for the inability to ram enemies. It also has the smallest hitbox, making it easier to dodge lasers.
 Gelatinous Pillion has the fastest vertical mobility and can help avoid damage when above Mechdusa, but is noticeably slower horizontally.
 Blessed Apple has the highest run speed of any mount at this point, which can enable quick getaways with the
  Shield of Cthulhu.
Armor

 Adamantite armor is best for melee and mage players and good for ranger due to high stats.
 Frost Breastplate should be used for melee weapons like the
  Drippler Crippler(Desktop, Console and Mobile versions) that do not benefit much from melee speed.
  Mythril Greaves/
 Spider Greaves are also options for glass cannon builds.
 Frost armor is the best option for ranger, with much better defense than Adamantite Mask in return for slightly less damage.
 Spider armor is the best choice for summoners, with some value for
  Obsidian armor if whip range is the main issue.

 Titanium armor could deal more damage than its competitors by making use of the
  Titanium Barrier buff, but Mechdusa will rarely be close enough to make good use of it.

 Orichalcum armor and
  Forbidden armor can deal high damage to the Destroyer, but have worse stats otherwise.
 Crystal Assassin armor can be useful as a replacement for a Shield of Cthulhu, but is otherwise worse than other options.
Weapons
Mechdusa is very large and has many different components that can be damaged, so weapons with an area or piercing effect have a strong advantage at the beginning. Due to the different nature of the bosses that make it up, you may want to switch out weapons as the fight progresses, such as switching to single-target damage once the Destroyer portion dies. These recommendations focus on specifically the best weapons for each class; there are cases of weaker, easier-to-obtain weapons that may be more desirable, such as Dao of Pow compared to Drippler Crippler.
- Melee Weapons
- Drippler Crippler has great range and extreme damage particularly against the Destroyer.
 Shadowflame Knife is good for the Twins and Skeletron Prime, and decent against the Destroyer.
 Bananarang has good single target damage and long range, but is weak against the Destroyer.
- Ranged Weapons
 Daedalus Stormbow is great against the Twins and Skeletron Prime with
  Ichor Arrows and against the Destroyer with
  Unholy Arrows. However, it requires some open space above the player for it to be fully effective, which can limit its effectiveness if you are consistently jumping into a ceiling, and it struggles to hit the Destroyer if you never leave a solid floor.
 Dart Rifle or
  Dart Pistol with
  Crystal Darts are great for sniping the Destroyer and deal lots of damage to the Twins and Skeletron Prime, with
  Ichor Darts being more effective at cleanup once only 3 enemies remain.
 Cursed Darts can do more damage to the Destroyer, but only if the body is exposed above solid blocks, requiring specific aim. They do not perform as well as Crystal Darts when shot directly up.
 Uzi and
  Onyx Blaster are good options with Crystal Bullets against the Twins and Prime, or with Explosive Bullets against the Destroyer.
- Do not use the Star Cannon. It may seem appealing for killing the Destroyer, but Mechdusa reflects all Star Cannon projectiles due to for the worthy's effects.
- Magic Weapons
 Clinger Staff is the best weapon against the Destroyer, able to consistently kill it in around 10 seconds with no further input from the player if the coil is exposed. It can also get decent damage against the other bosses, but the fight is too focused on running away for it to see much use there.
 Nimbus Rod has similar use in the middle of the fight for doing some damage as Mechdusa passes through it, but cannot deal much damage to the coil.
 Orange Zapinator has the best overall damage among mage weapons, particularly if it gets a lucky damage multiplier. However, it has the unique potential problem of killing Skeletron Prime first on accident, which multiplies the difficulty of the fight several times.
 Shadowflame Hex Doll needs to be close to the boss to deal good damage, but is a very high damage option if you can stay close. Make sure to have another weapon available for Spazmatism phase 2.
- Summon Weapons
 Sanguine Staff is hard to get, but the best summon for damage both for summoners and non-summoners. Use with Firecracker.
 Blade Staff is easier to get and works well against the Destroyer coil. Use with Cool Whip.
 Queen Spider Staff is the best sentry available at this point, most useful if you can keep the Twins and Skeletron Prime centered near your sentries.
 Firecracker is the best option for high-damage slow minions like the Sanguine Staff. If you can stay close enough to use multiple whips, use the
  Snapthorn for its whip speed buff as well.
 Cool Whip is the best option for low-damage fast minions like the Blade Staff. If you can stay close enough to use multiple whips, use the
  Spinal Tap and/or the Snapthorn for more tag damage.
Overall, the Drippler Crippler and Clinger Staff are the best options against the Destroyer, and the Daedalus Stormbow and Dart Rifle are the best options against the Twins and Skeletron Prime. Having a way to inflict ichor is also very useful for better damage; Flasks of Ichor and ichor ammo are options, but if inflicting ichor through a secondary weapon, Golden Shower has the best range and pierce.
Accessories
Defensively, the ![]() Cobalt Shield or its upgrades provide knockback immunity. With good defense, Mechdusa will do very little damage with its projectiles, making knockback the only thing that can threaten the player. For mobility,
Cobalt Shield or its upgrades provide knockback immunity. With good defense, Mechdusa will do very little damage with its projectiles, making knockback the only thing that can threaten the player. For mobility, ![]() Dunerider Boots are the main advantage for not using a mount due to their immense speed boost on a sand bridge. Wings can also work for dodging vertically, but tend to be harder to use while the Destroyer is alive. Using a mount for the fight alongside
Dunerider Boots are the main advantage for not using a mount due to their immense speed boost on a sand bridge. Wings can also work for dodging vertically, but tend to be harder to use while the Destroyer is alive. Using a mount for the fight alongside ![]() Featherfall Potions is generally the easiest way to approach the fight. These are the most important accessories to consider for the fight.
Featherfall Potions is generally the easiest way to approach the fight. These are the most important accessories to consider for the fight.
- Other mobility accessories
- A
 Bundle of Horseshoe Balloons or
  Yellow Horseshoe Balloon is the only kind of mobility accessory mounts can use, and also give a huge vertical mobility boost to wings.
 - Harpy, Frozen, Fairy, or Fin Wings are the best options for wings at this point, though this requires either killing Wyverns or doing fishing quests.
 Frog Leg and its upgrades boost jump and flight speed to help dodge attacks.
- Shield of Cthulhu provides a dash, which can let you instantly reach max speed with the Blessed Apple.
- Other defensive accessories
- As the fight is very long,
 Charm of Myths will provide a lot of extra HP.
  Flesh Knuckles and their upgrades are very effective against Mechdusa's lasers, which are the hard attacks to dodge.
 Worm Scarf and
  Brain of Confusion are less effective against lasers with good defense, but are more effective against the Prime Vice and reduces some damage from passing through the Destroyer's body. You should not be taking melee hits from Mechdusa for the most part.
 Cross Necklace or its upgrade can give much more time for attacking the Destroyer's coil at the start of the fight, but is less useful after unless you are struggling with the Prime Vice.
- Damage accessories
- Your class Emblem is the highest damage-boosting accessory available at this point.
 Magic Quiver can be useful with Unholy Arrows for boosting their velocity, but has a weak damage bonus.
 Berserker's Glove can provide extra attack speed on top of defensive benefits, most useful for whips. The best melee weapons for this fight do not benefit much from melee speed.
- The
 Squire's Shield or
  Apprentice's Scarf can be helpful if you can use sentries effectively.
Potions
Due to the high HP and low damage of Mechdusa, defensive potions are disproportionately strong. A food buff should also be used for its various benefits; Pumpkin Pies are an easily obtained source of Plenty Satisfied, or Bacon from Pigronatas can be used for Exquisitely Stuffed.
- Mobility
 Featherfall Potions provide a high degree of control over vertical mobility. Extremely strong with mounts, very strong otherwise. Holding up allows you to stay in the air for a long time, avoiding lasers or jumping over Mechdusa entirely. Harder to use if also using Gravitation Potion.
 Gravitation Potions allow you to fall above Mechdusa onto a ceiling and run along that for better value from Dunerider Boots.
 Swiftness Potions give better air speed and acceleration when not using a mount.
- Survivability
 Ironskin Potions and
  Regeneration Potions are easy to craft and extremely strong for this fight. Over a 3 minute fight, a Regeneration Potion is as impactful as a Worm Scarf, while an Ironskin Potion is effectively an extra Flesh Knuckles.
 Greater Healing Potions are available now and very helpful for burst healing.
- An
 Endurance Potion and
  Lifeforce Potion can be nice small bonuses for extra survivability, but can be annoying to craft.
 - A
 Heartreach Potion can help with grabbing hearts dropped by Probes.
- Damage
- Where appropriate for the weapon type,
 Ale,
Ale,  Archery Potions, and
  Magic Power Potions should always be used.
  Summoning Potions are also useful, but are harder to obtain.
  Super Mana Potions are available for mages now and are the best way of restoring mana.
 Rage Potions and
  Wrath Potions are hard to farm, but are nice damage bonuses as well.
Specific Strategies
The simplest approach to Mechdusa is to run away. Skeletron Prime will speed up until it catches up with its intended idle position, but while it tries to catch up, all of its limbs, the Twins, and the Destroyer will be further away from you, and projectiles will take longer to reach you due to your higher speed, giving you plenty of time to decide whether to jump or not.
The faster you move, the more difficult it is for the Prime Vice to catch up and hit you, and the slower projectiles towards you will be. However, this also makes it more likely to despawn parts of Mechdusa, preventing you from actually winning the fight. Running away also makes it disproportionately hard for melee and summon weapons to deal damage.
If using Wings, fly up and down as you run away, always sticking to the air. This will make the Destroyer more threatening, due to it being above the ground, but will make dodging the Prime Vice easy. Focus on killing the Destroyer first, and once Spazmatism reaches phase 2, use jumping to push Spazmatism higher into the air so it can't spray cursed inferno on you on the ground.
Alternatively, you can circle around Mechdusa. This keeps Skeletron Prime relatively still and makes many projectiles miss due to you moving perpendicularly to them. However, this is much harder while the Destroyer is still alive, due to its large body cutting off your path below Prime's head and the swarm of death lasers that the Destroyer can send due to you going high enough for it to rise above the floor. The Golf Cart mount can circle anyways, due to gaining iframes when dashing into the Destroyer's body, though you still need to worry about lasers.
Skeletron Prime is much slower than normal, and due to for the worthy's effects, the Destroyer also has more segments. This means you have a long time to attack most of the Destroyer's segments at once before it uncoils from its spawn. For this, check where Mechdusa spawns on the map, and run there. The coil starts at the ground level the boss started at, but will go down if Skeletron Prime goes up, and up if Skeletron Prime goes down. This lets you attack the coil by either making it spawn on a platform, so you can drop down and attack the exposed coil below, or by lowering yourself down below where it spawned. Depending on your arena, this may require digging below a solid floor, necessitating good mining speed buffs. Skeletron Prime will start "spinning" 10 seconds after spawning, and this serves as a soft time limit, as with its extreme contact damage it will force you away from the coil at that point.
The best ways of attacking the coil are with a Drippler Crippler or Clinger Staff. The prior does much more damage, while with the latter you can place the pillar then focus on your own positioning. Drippler Crippler can kill the Destroyer in around 4 seconds on Legendary difficulty, while the Clinger Staff needs around 10. Summoners can quickly kill the coil with Sanguine Staff and Firecracker, while Rangers can kill the coil with Explosive Bullets, Sandgun, or Hellwing Bow. Killing the Destroyer early in the fight allows you to circle around the rest of Mechdusa freely, and the large amount of probes released is an easy source of hearts to heal back damage taken.
Despawning
If Skeletron Prime is more than 375 blocks distance away, it will despawn and take the other two parts with it. However, if you stay within that range, but with the Twins and Prime offscreen for 12.5 seconds, the Twins and Prime will despawn, with the Twins generally despawning first due to their limited speed. This allows you to kill only the Destroyer for post-mech gear such as Hallowed Armor or Old One's Army gear. This can sometimes happen in normal clear attempts as well if the player is moving at high speeds away for a long time, such as with Dunerider Boots or a minecart track.